This is an old revision of the document!
Getting Started
Warning, this is a guide for an Early Access game. Things might change and this guide will occasionally be lagging behind those changes. That being said, it still should give you a decent idea of what to do. Also, we'll assume you're using the default keybindings in this guide.
Map Setup
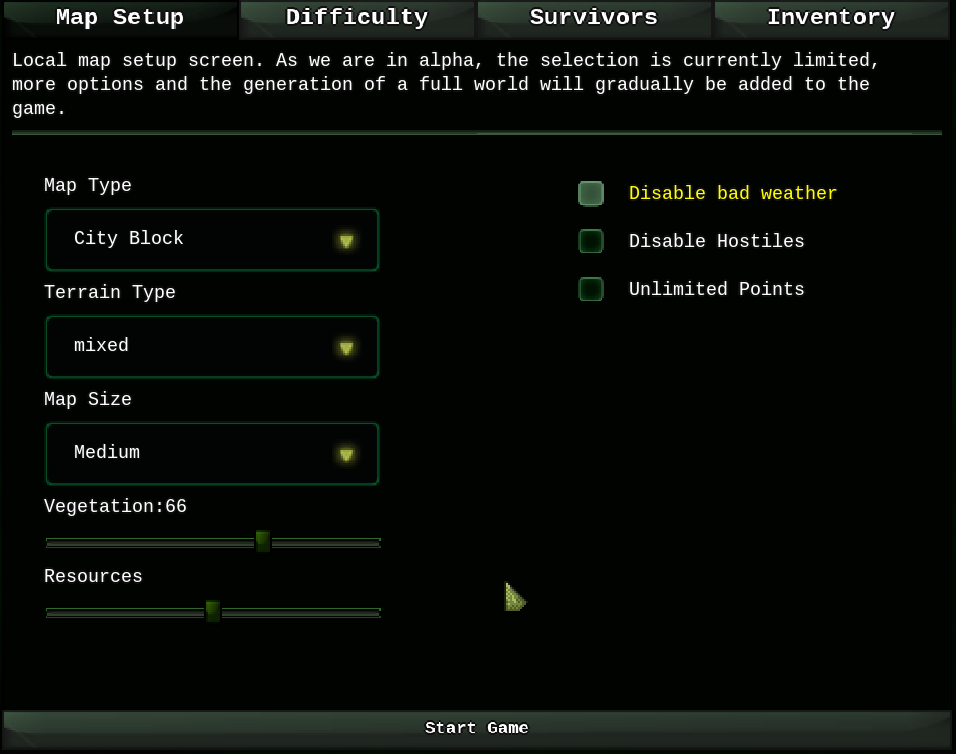
Let's start by selecting a map. To make it easy on us, let's take a city map, with a lot of vegetation, on an arid or mixed biome. This should give us a decent mix of early and mid game resources. Enough to get to a decent point on our own.
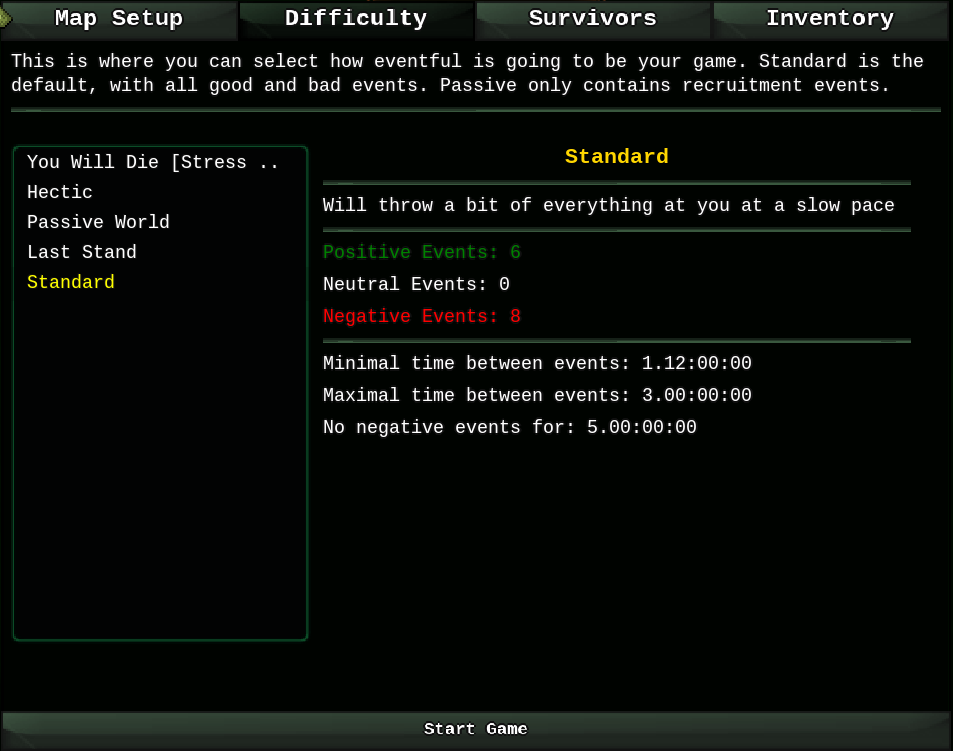
This is where you select how the game will play out. Standard or Passive is strongly recommended for a first game.
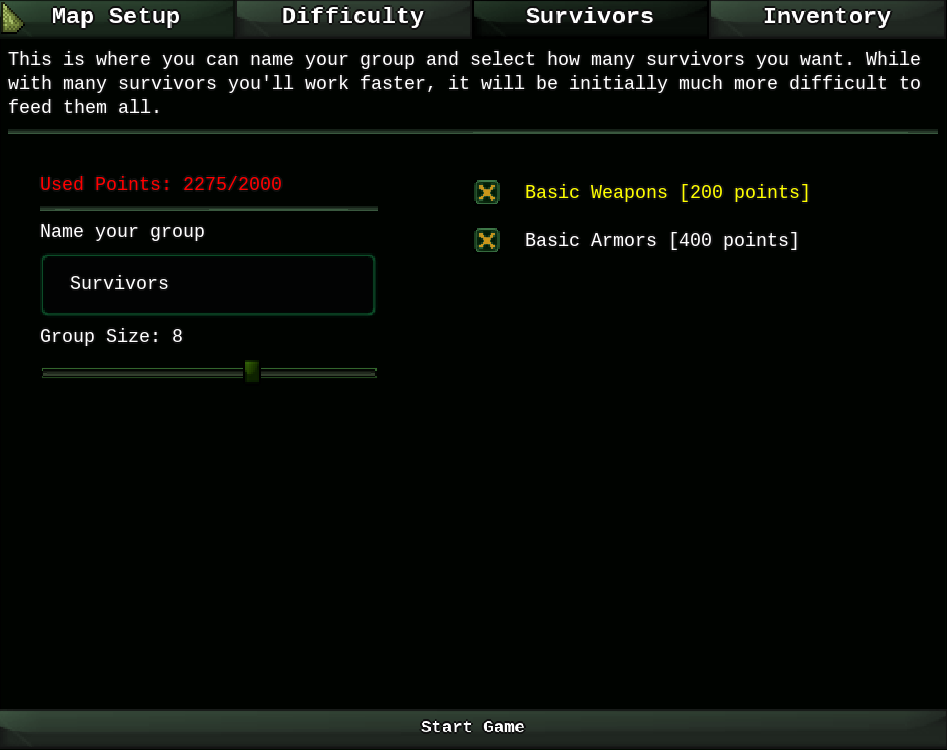
You can select your group's name, the number of survivors you want to start with and if you want to spend some points on giving them random, basic weapons. I'd strongly suggest to bring between 6 and 8 survivors. More will likely lead to mass starvation before you can setup food and water production. Also, to make sure your people survive an early raid and facilitate future expeditions, check the Basic Weapons and Basic Armors checkboxes.
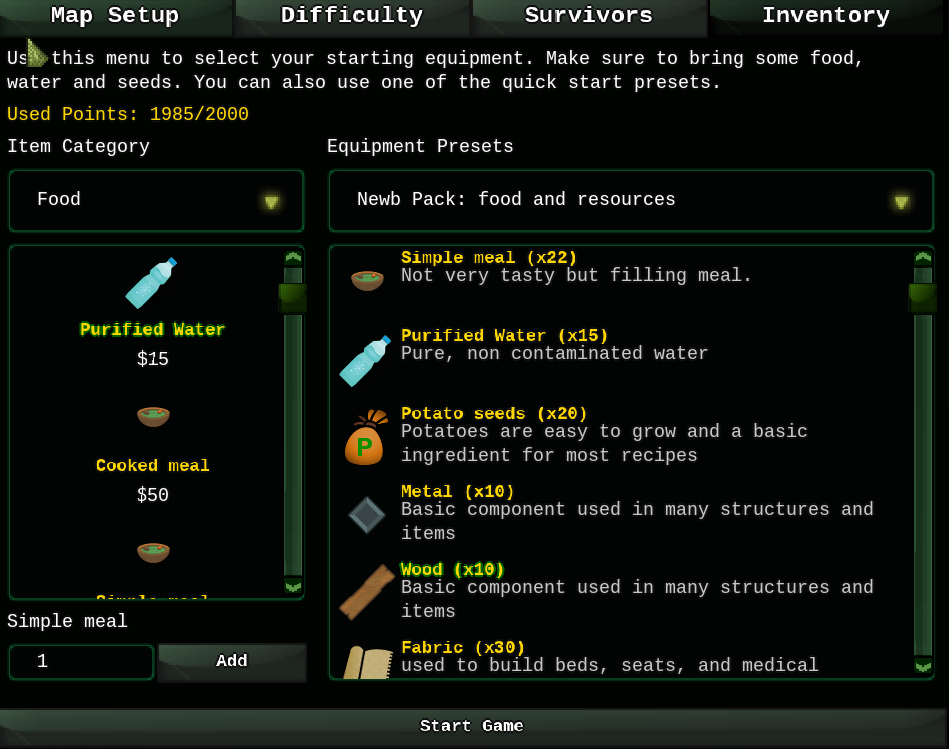
This is where you can choose your starting equipment. Use the menu on the left to add items. Right click an element in the large list to remove it. I'd suggest to remove the 2 spears. That should leave you with enough more to buy 10 more potato seeds and 1 more purified water bottle. Do so.
You could probably further optimize you starting position by removing the metal and stones and replace them by simple meals, but that shouldn't be necessary.
User Interface Overview
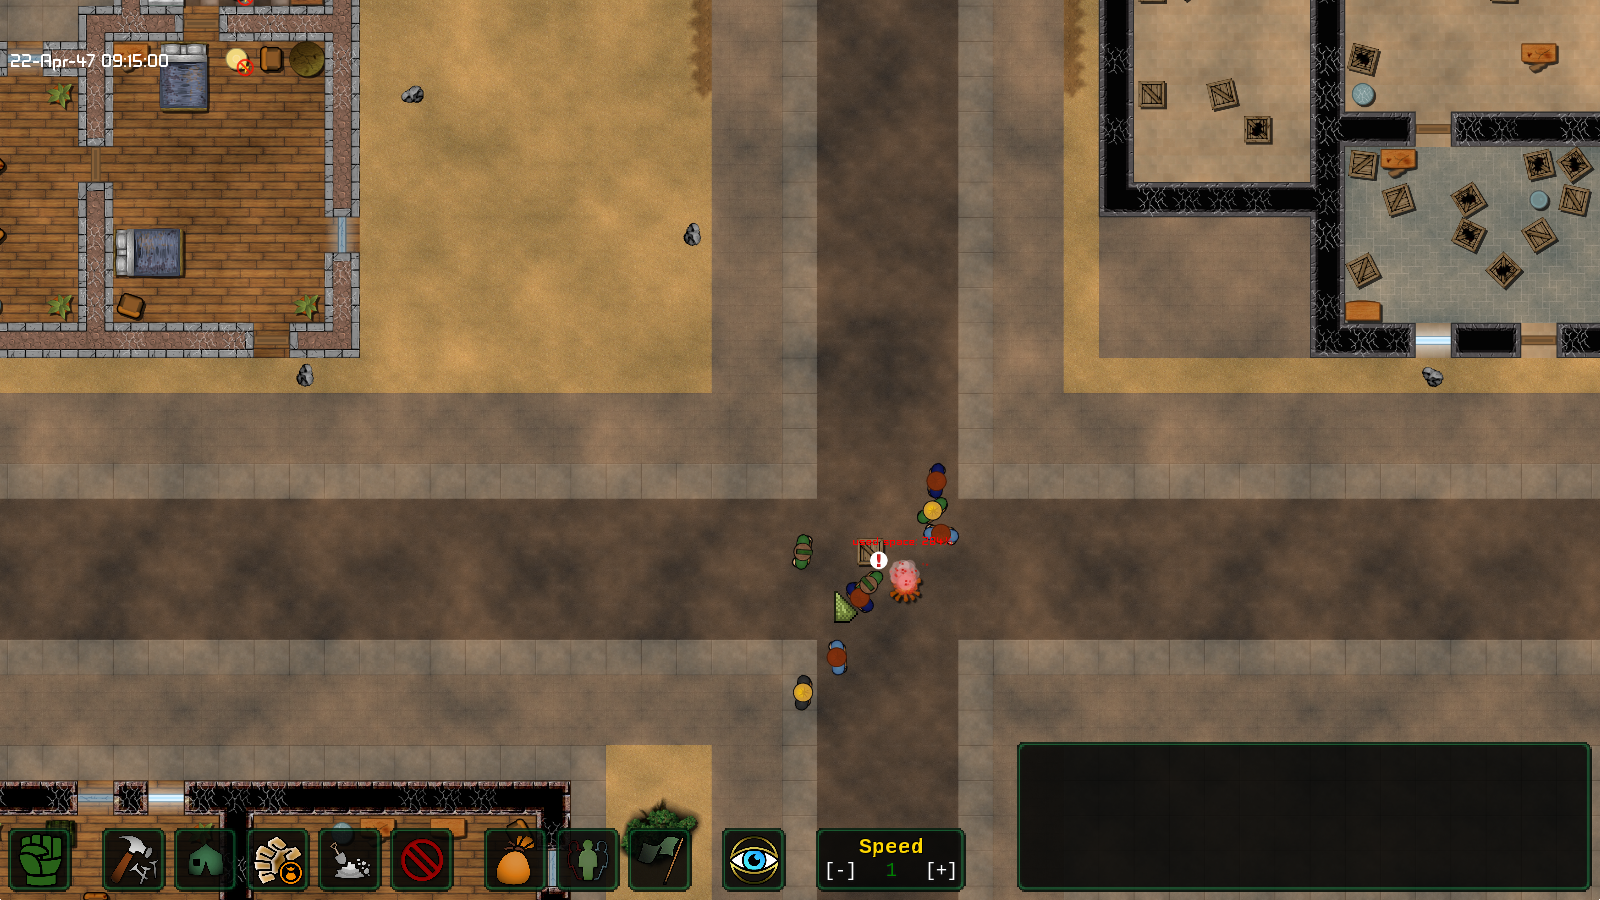
This is more or less the screen you'll end up with after map generation: a bunch of survivors around a campfire and next to a storage box containing all your belongings. You can move the camera around with the WASD keys, zoom in/out with the mouse-wheel and select stuff with a left click. Right clicking with the mouse outside of an opened menu will close it. Most buttons and menus have help tool-tips that will appear by hovering the mouse cursor over them for a second.
The main user interface is at the bottom of the screen. There's a row of buttons and the game log at the bottom right. Let's see what each of them does:
| This button is used to switch between standard and combat mode. It's used during enemy raids to take direct control of your survivors. We'll look at it in more details a bit later. | |
| [F1] : Toggles the Build Menu on/off. You'll be using this one a lot, you'll build pretty much anything from crafting stations to floors from this menu. | |
| [F2] : Toggles the Zone Menu on/off. This menu allows you to add and remove special rooms, zones and farms. That's another very important menu. | |
| [G] : This button is used to give your survivors the order to search containers on the map for loot. The job is done much faster than with a raze order, but obviously, you won't disassemble the selected items. | |
| [R] : This button is used to give your survivors the order to disassemble or raze anything you've selected. It can be used to get resources from walls, furniture, trees, rocks and pretty much anything on the map. | |
| [C] : This is the cancel button, it's used to cancel orders you've previously issued. Select whatever object you've planned to build, raze or loot and it will cancel the order. | |
| [F3] : Toggles the Storage Menu on/off. This is where you can keep track of everything stored in your containers | |
| [F4] : Toggles the Population Menu on/off. This is the menu used to monitor all your survivors | |
| Toggles the Faction Menu on/off. Right now it's just listing the ingame factions, it's not yet possible to interact with them or conduct diplomacy (v0.4.0) | |
| Toggles the filter panel on/off. This panel allows you to render various overlays on the screen, like displaying settlers' name, rooms, the electrical grid, and so on. |
Finally, there's a box to change the game's speed, which can also be done with the [-] and [+] keys.
Settler Info Panel
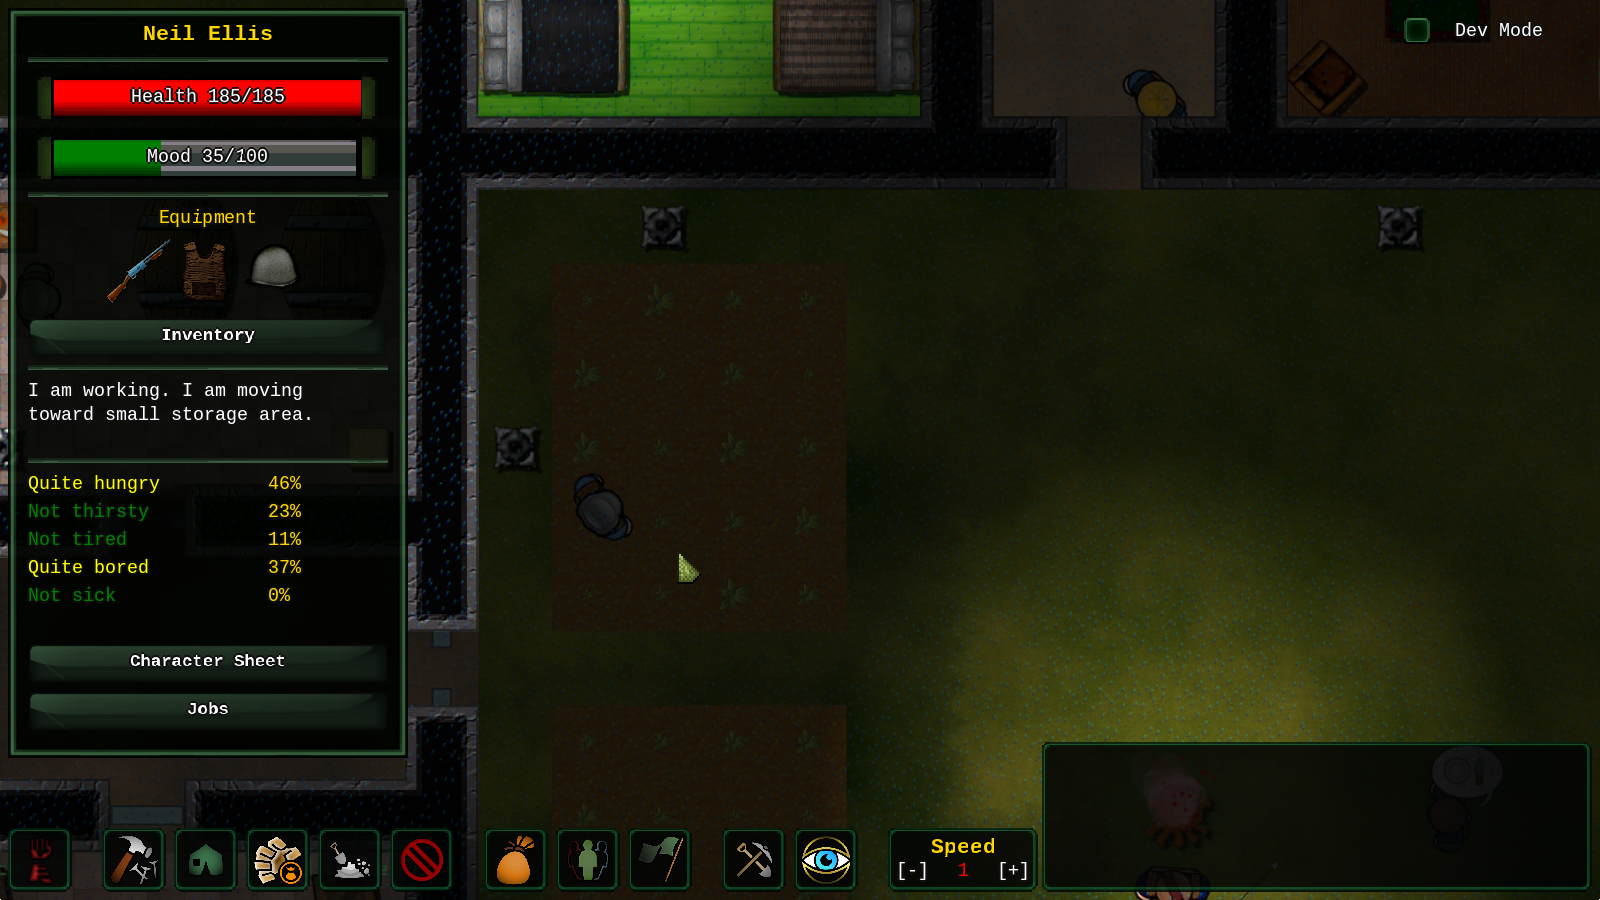 By left-clicking one of your survivors, you'll open the menu you can see in the screenshot above. It summarizes most important information about them. Additionally many parts of this menu are clickable:
- Click on their name to rename your survivor
- Click on the mood bar to get detailed mood information
- You can click on the weapon/armor/headgear icons to change their equipment (if there's something available in your storage areas). A right click will show the stats for the selected weapon or armor piece.
- You can see everything they are carrying with the inventory button
- Finally you can click the Character Sheet and Jobs buttons to access more information about your settler.
Right clicking anywhere on the screen outside of the menu will close it.
Building Stuff

This is the build menu. It's fairly straightforward, left click an item, and then left click on the map again to place it. Before placing the item on the map, you can rotate it with the [A] and [E] keys. You can rotate by 45° increments by holding [Shift] and on of the rotation keys. Reset rotation by pressing [Backspace]. Also, some items (furniture like chairs and tables mostly) have multiple sprites for you to choose from. You can either use the big green arrows at the bottom or use the [X] key to cycle between the different ones.
