Table of Contents
Automated Carriers and Stations
In addition to the Standard Commands, you will find two advanced commands in the Additional Command slots of your carriers and in the command order of your docks that will allow you to setup your carrier/station and completely automatize the way they defend themselves. As those commands work exactly the same for ships and stations, I will use the generic term “Carrier” no matter if talking about a station or an actual carrier. Also notice that some of the following screenshots may be somewhat outdated, but the documentation itself isn't.
ADS: Carrier Settings
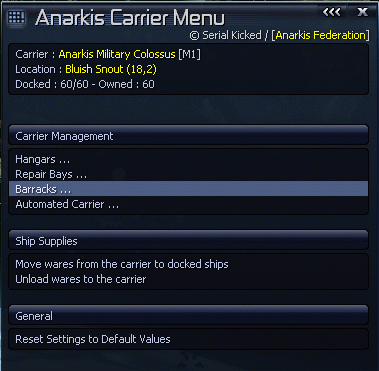
Called “Setup Defense” for stations. This command will display a setup menu, allowing you to change your docked ships settings, setup the Automated Carrier logic, hire/fire and use mechanics, transfer wares between your carrier and much more.
Hangars
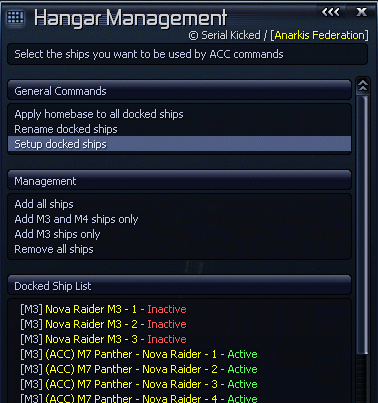
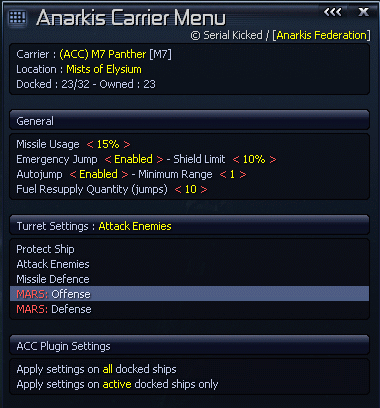
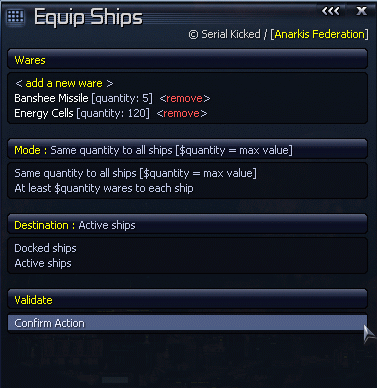
The hangar is the place where you can setup your docked ships in mass. You can also select which ships will be used or not by the commands and tasks. Damaged ships will always be ignored. The Setup Docked Ships menu allows to set the missile usage, the jump and turret settings. If the MARS turret script is installed, you can even setup your docked ships' turrets to this system. Ships without the Motion Analysis Relay System will fall back to standard turret settings (mars offense = attack enemies | mars defense = missile defence).
Barracks
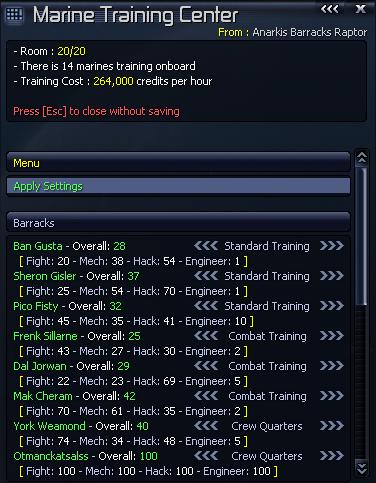
Your Stations and M1 class ships have access to the Barracks option. This menu allows you to train your marines. You can give them combat training (24,000 credits/hour) or standard training (16,000 credits/hour). The first option will slowly improve their fightskill, while the other works for the engineering, hacking and mechanical skills. Notice that marines with a high engineering or mechanical skill (>50), and who aren't training, will help with ship repairs for free.
Repair Bays
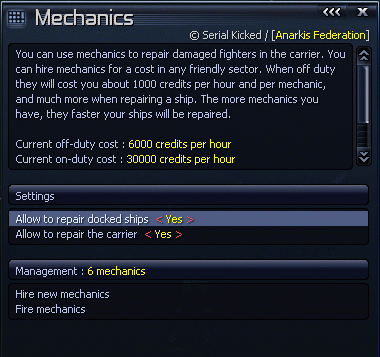
You can hire mechanics to keep your carrier and fighters at full strength. However, they will cost you money, even when they are not doing anything. To hire a new mechanic, your carrier needs to be in a sector with a friendly trading station and you will need to pay 50.000 as an initial hiring cost. This initial fee paid, each mechanic will cost you 1.000 credits per hour when off-duty, and 15.000 credits when on-duty. If, for a reason or another you don't have enough money, they will immediately quit the carrier, so pay attention to you finances when using this features. Mechanics are very cheap, but they are also really slow : 15 hull point per minute per mechanic. It would take about 10 game hours for a single mechanic to repair a 90% damaged Nova, on the other hand it will only cost you 150.000 credits (instead of 10 times more at a shipyard). You can't have more than 20 mechanics on the same carrier.
Notice that if you allow to repair both the carrier and the docked ships, mechanics will always start with the carrier. Repairing a M1, M7 or a TL - even lightly damaged - can take ages so you may want to disable carrier repairs temporarily to proceed with your fighter wings first.
Ship Supplies
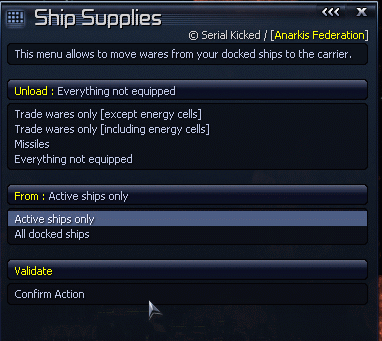
This is where you can transfer wares between your carrier and your docked ships. Like everything else here, the whole process is intuitive and menu driven. The only thing that need a real explanation is the difference between: “Same Quantity to…” and “At least quantity to…”. If you don't have enough wares in your carrier to equip all your docked ships, this command will try to give the same amount of the ware you're transferring to each ship. The second option will give the exact amount you've specified to each ship, meaning that if you don't have enough, some docked ships won't be equipped at all.
Automated Carrier Setup
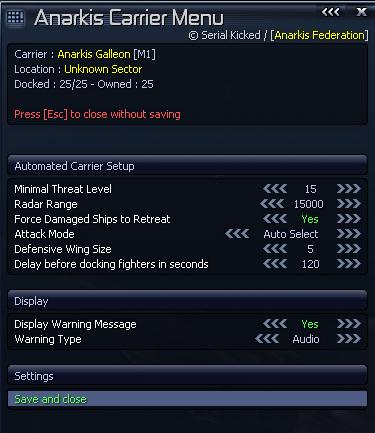
This is where you are going to setup you carrier when it is in automated mode and how it will respond to threats. Default settings are usually good enough, so be sure to understand what you are doing when altering those settings.
Minimal Threat Level
This is where you can set at what danger threshold the carrier will start launching fighter wings to defeat enemies. This is probably the most important setting, and you'll probably want to change it according to your playing style. To understand how this “level system” works, you'll need to know the “threat” value for each kind of ship and you should know that the carrier will always send ships if an hostile M1 or M2 is spotted in range or if your carrier is under attack by something that could kill it.
| Ship Type | M5 | M4 | M3 | M8 | M6 | M7 | TL | TM | TP | TS |
|---|---|---|---|---|---|---|---|---|---|---|
| Threat Value | 1 | 2 | 5 | 10 | 14 | 35 | 15 | 8 | 2 | 2 |
In its current version, ADS will only take into account ships that are enemy toward you. This is very important to understand as the Friend/Foe settings in X3 are somewhat confusing. If you set the Argons as an enemy race, on screen they will be shown as red, but in reality they will still be neutral/friendly toward you until you attack them. So in this particular case ADS will ignore them in its calculations. Also notice that ADS will ignore weaponless ships like civilians and goner ships.
So, if you set the Threat Level to 10, ADS won't launch its fighters until there's two hostile M3 or five M4 in its radar range or any other amount of enemies raising the level to 10. You are maybe asking yourself why not setting the Threat Value to 1 in order to keep your sectors free. Well, launching like 30 ships against every single M5 is an overkill, and if you set your carrier to patrol across pirate sectors, you'll soon notice that the said carrier will probably never leave the sector because you will always have another ship to destroy. Moreover, and especially in OOS combat, launching tons of ships against non threatening targets is CPU intensive (if you have many carriers) and non efficient as your carrier will deal with them itself without any issue. That's why a value between 10 and 20 is usually considered the best option. This said, you are free to experiment :)
Radar Range
This setting is independent to the real radar range of your carrier. You may consider that as a cheat, but it's in fact to reduce CPU usage. As an example, other scripts like CODEA will deploy scout ships to increase the carrier's radar range. In my opinion, this is a waste of CPU resources especially for a fire and forget setting like the Automated Mode. As 9 times out of 10 you won't even see those said scouts as you're in another sector, it's kinda pointless and I achieve the exact same result with less micromanagement and a more straightforward coding. Moreover there's a few drawbacks if you change the setting to a too high value.
If you set this value to something like 100.000 (it's in meters) you will quickly notice that your fighters will have a very long road to follow to get to their target, they wont have the support of the Carrier when fighting, the carrier will more or less be defenseless, and fleeing damaged ships will have plenty of opportunities to be destroyed when going back to the carrier.
For carrier ships, it's strongly advised to keep the value between 15.000 and 50.000 meters. Things are a bit different for stations, as destroying them is very long process even in OOS combat. Their default setting in 100.000, you should adjust it to the distance of the farthest gate or friendly station.
Force damaged ships to retreat
You can allow fighters sent by the carrier to retreat when shield is below 10% or when the hull is damaged. If the retreating ship successfully evades taking hull damages, as soon as his shield is above a decent level, it will resume the assault. If you disable this feature, fighter wings will fight to death. This feature also works with manual commands like Send attack wing, Clear Sector and defend object.
Attack Mode
This command is kinda outdated and in future versions its meaning will change. The default mode (Auto) is, by far, the best option here. In Auto mode, it will send differently sized wings, against enemies, based of the threat they are causing if a capital ship is found. As an example, If there's an enemy M7 and a M3, it will send a really big wave against the M7 and a much smaller one against the M3. If there's no capital ships it will send wings based on the distance toward the carrier.
In future versions this command will be used to switch between a defensive mode and an offensive mode.
Defense Ship Count
When the automated carrier is in battle it will deploy some ships with the mission to protect the carrier itself. You can set here how many ships you want to be used for this task. However the said defensive wing will only be used as such if necessary.
Delay before docking deployed fighters
This command allows you fighters to keep patrolling around the carrier for a while once the threat has been eliminated in case new enemies appear. This is especially useful as it will prevent your fighter in going into a loop of docking/undocking time consuming procedures (and during when the carrier is a sitting duck) when enemies reinforcements are expected. You can disable this feature by setting it to zero, but it's not advised.
Warning Message
Allows your carrier to send you an alert message when it is in danger, so you can react before anything really bad happen. You can ask for 3 kinds of warnings: a popup window, an audio message, or a subtitle message (with a beep).
ADS: Automated Carrier
Called “Sector Defense” for stations. This command is designed to be used on you patrolling carriers, still you can use it on a carrier which is following you or any other kind of carrier as long as you are not flying it yourself. You can't use this command on your personal carrier for various (good) reasons, like dock/undocking fighters going “Boom!” and several issues it would cause to the AI. This said nothing prevent you to jump in one of your docked ships and then activate the command. For this command to do anything, the carrier will need at least 3 undamaged docked ships set as “active” in the hangar menu.
Once enabled, the carrier will continue its business as usual, but now it will use its wings of fighters to protect itself and intercept any hostile in range according to its settings. In other word you'll never see your carrier and all its docked ships destroyed at the same time because the game forgot to use or launch the docked ships during OOS battles.
This is a very efficient command as a single M1 with a full wing of well equipped M3 can lay an average Xenon sector to ashes without any painful micromanagement of the fighter wings. But don't get this as an “uber massive weapon of mass destuction”, it's not and it doesn't “cheat” in any way. It only optimize the way ships are fighting. You will still suffer losses against M2 and strong M7 ships.
Also notice that if for a reason or another your carrier is destroyed, the coordination between wings will be destroyed, so be careful.
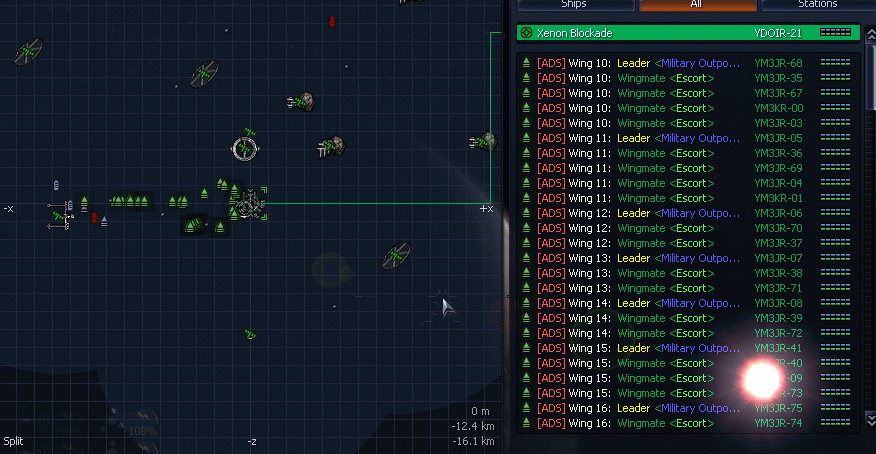
Automated mode, on your sector map will display fighters used by ADS with names and colors depending of their status. Once they have docked back to the carrier they will get back their usual name.

